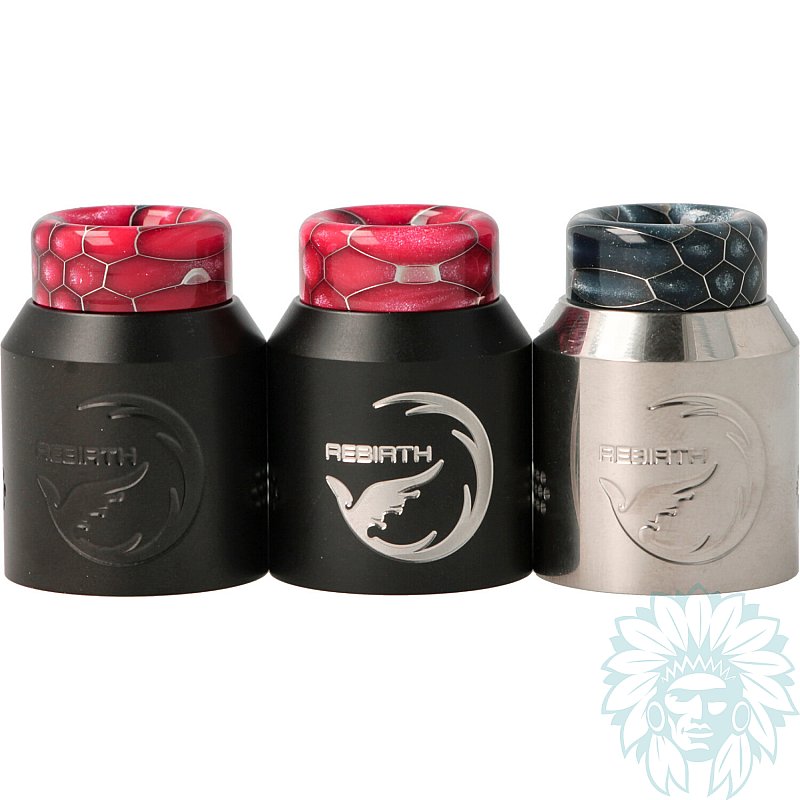
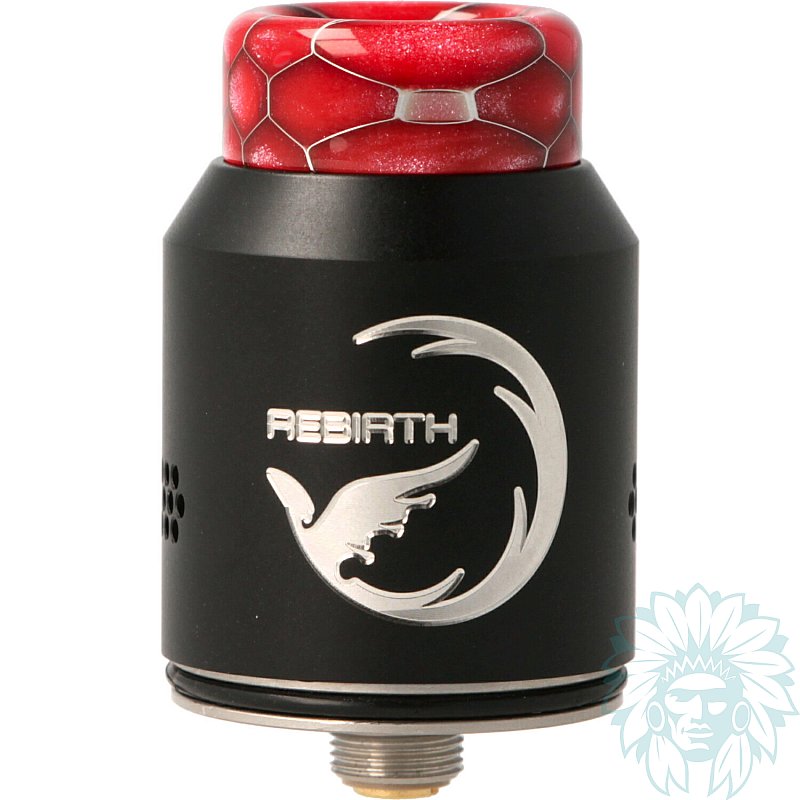
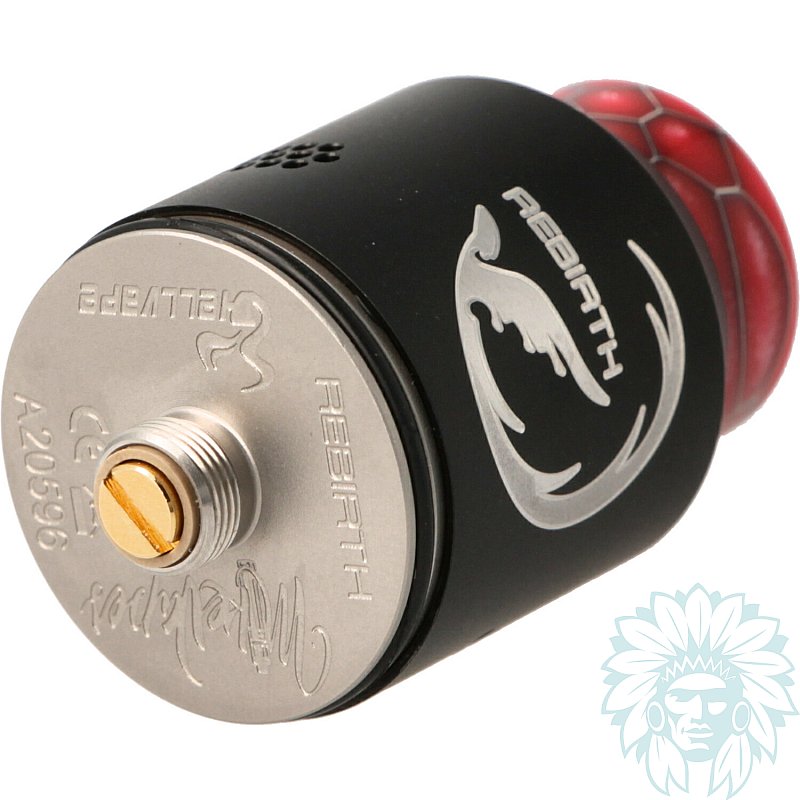
Hellvape Rebirth RDA dripper
Tank: BF adaptable - Diameter: 24 mm
Type: RDA - Number of coils: Single or dual coils - Draw: Direct
Level: expert
- Calumette, the world's only ISO 9001-certified vape retailer
- Loyalty reward
- Payment by credit card, cheque
- You will be notified by SMS when order shipped
Hellvape Rebirth RDA dripper
The Rebirth dripper is the story of a meeting between Hellvape and American youtuber Mike Vapes. Hellvape has revisited the dripper by offering a 24 mm plate that can accommodate single or dual coil assemblies. The Airflow has 16 orifices for an airyl vape. Like a Phoenix, Rebirth brings out the quintessence of your flavours and distils voluminous clouds of vapor into the air.
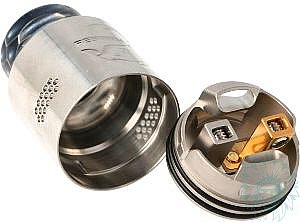
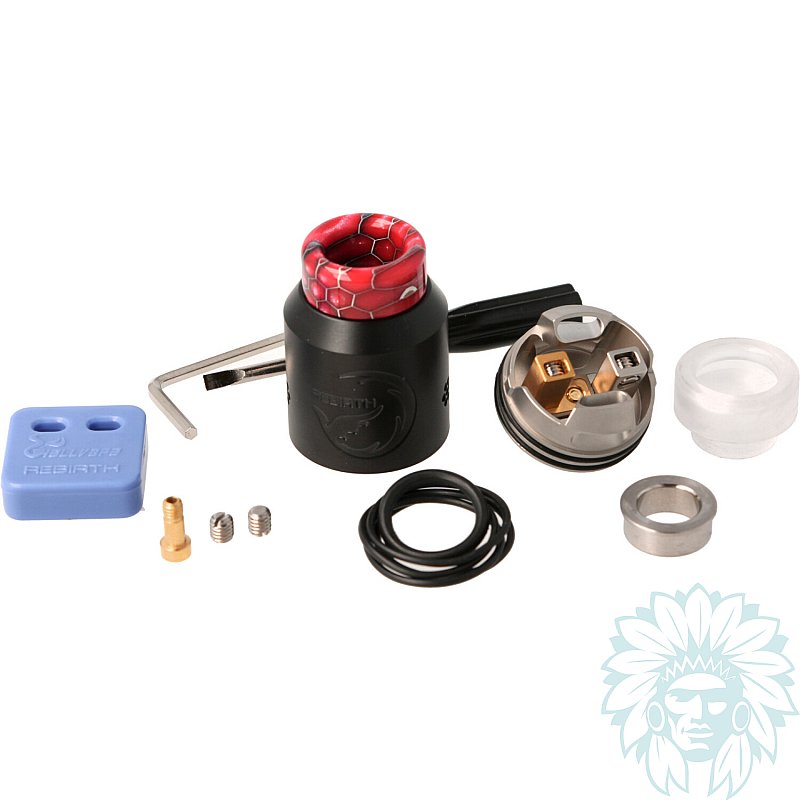
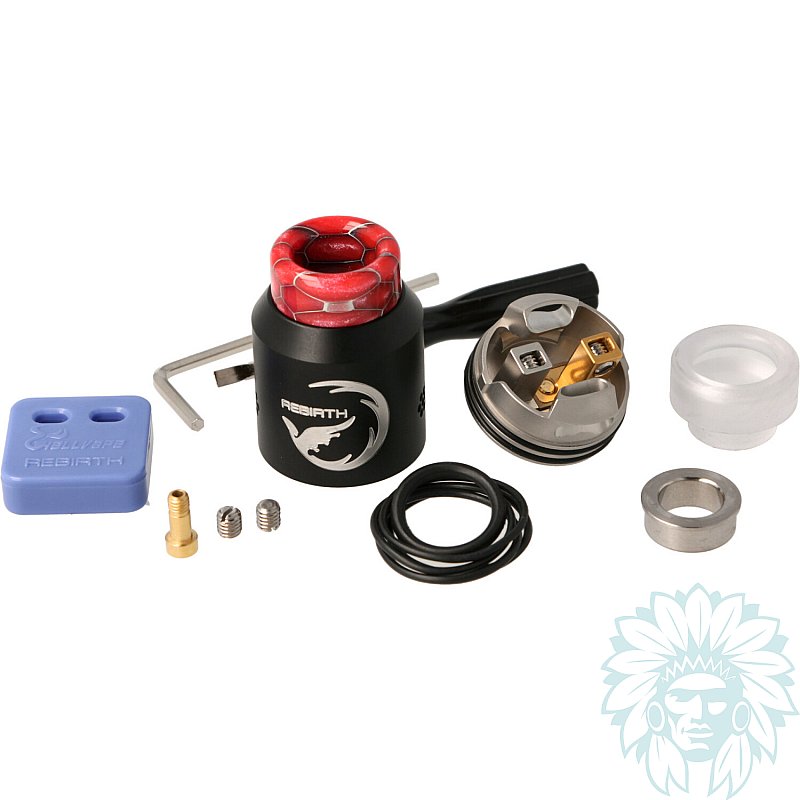
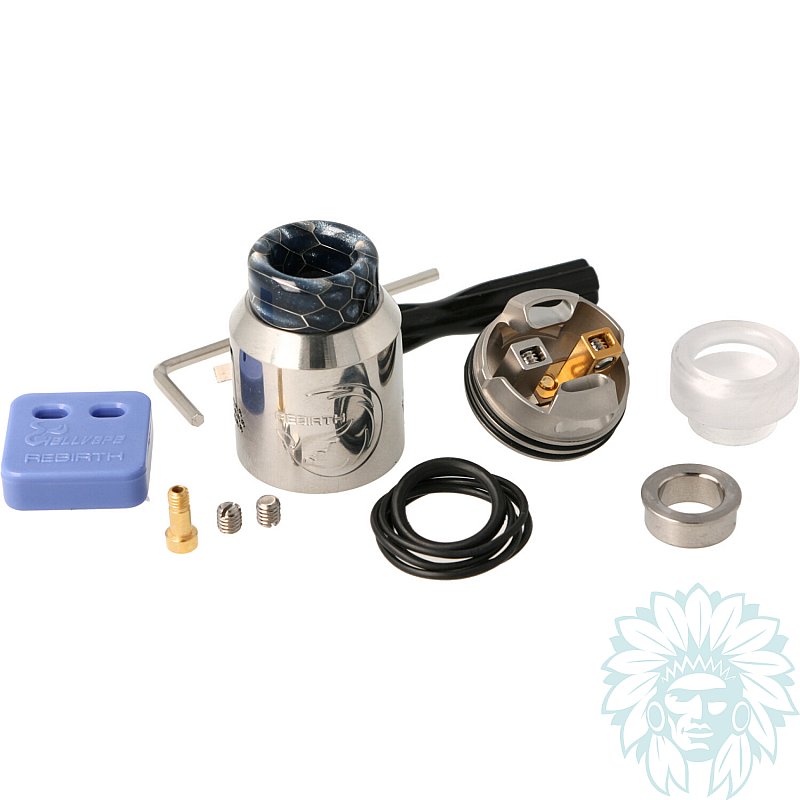
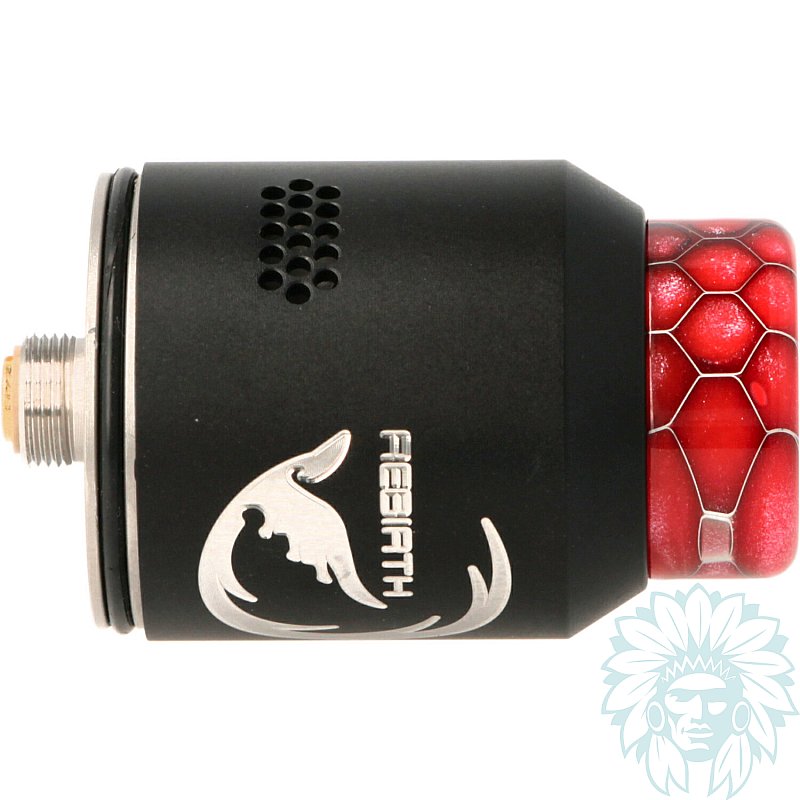
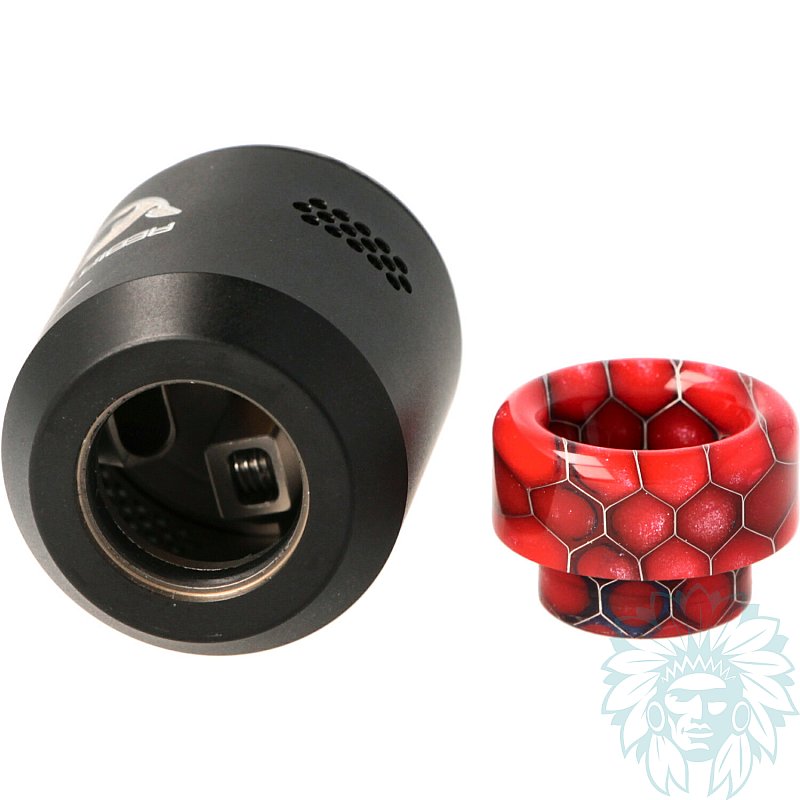
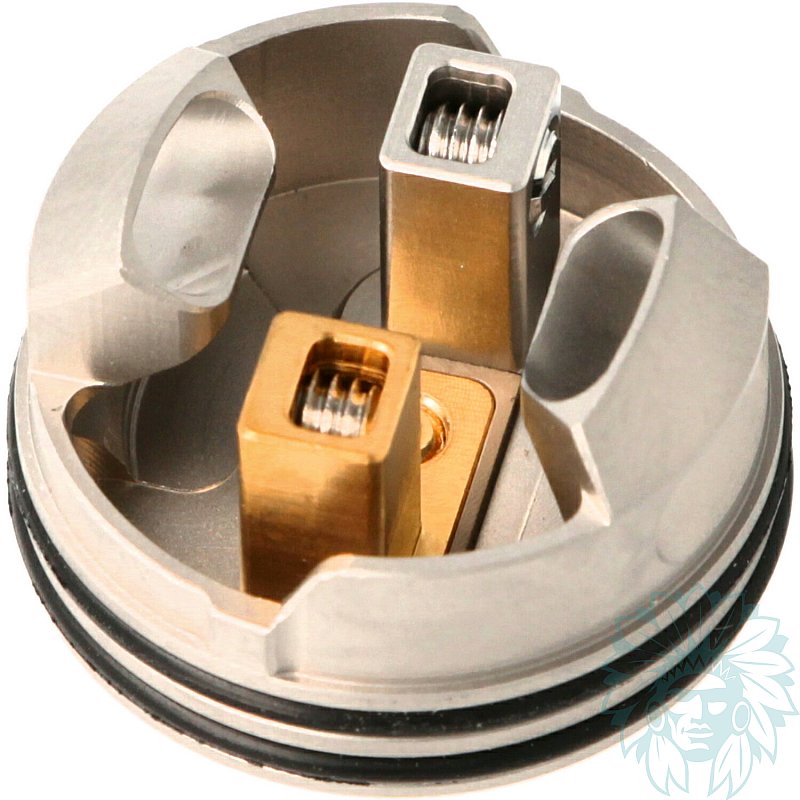
Hellvape Rebirth Dripper disassembled
The honeycomb airflow and wide drip tip set the tone: the Rebirth dripper is designed for powerful, airy DL vaping. On opening, you are struck by the attention to detail in the design of this dripper.
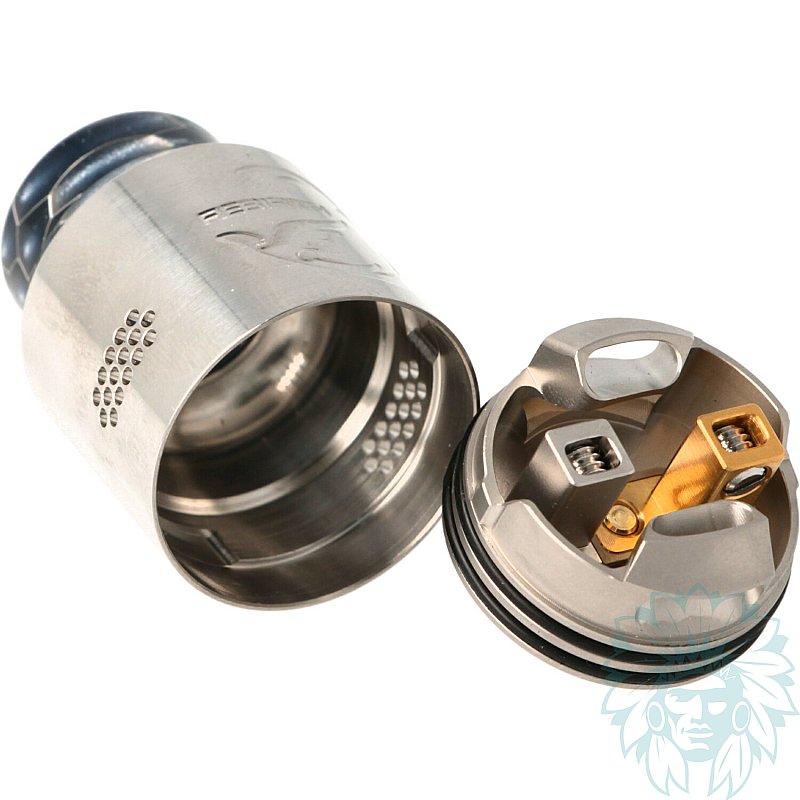
There are two mounting studs to accommodate a single coil or double coil setup. The fixing screws are easily accessible and positioned high enough to allow a 6 mm reserve of liquid. A real plus for this type of equipment.
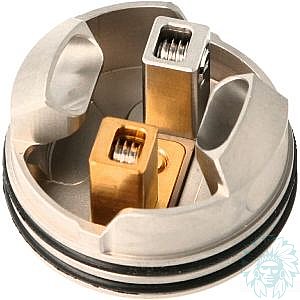
Mounting plate and flow direction lights on the coil
While the rest of the plate is carved from solid and impresses with its precision, what really makes the difference on the Rebirth is the directed airflow. Two air inlets optimise the cooling of the coil(s), even at high wattages. It's worth noting that these lights are sublime and add to the cachet of this dripper. An additional 510 BF pin allows the Rebirth to be used as a bottom feeder.
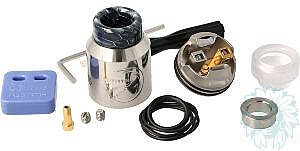
Hellvape Rebirth RDA complete dripper kit
Calumette's review: A superb dripper that lives up to its name. The airflow has been redesigned to avoid overheating whatever the setup. Hellvape has revived the dripper by controlling the airflow like never before.
E-liquid not supplied: Complete your purchase with e-liquid.
For a first purchase, we advise you to test several different liquids, for example at least one Classic flavour and at least one fruity flavour.
Advantages
- High-performance air intake
- Single or double coil assembly
- BF compatible
Kit contents
- 1 Hellvape Rebirth RDA dripper
- 1 spare O-rings kit
- 1 flathead screwdriver
- 1 set of flat head screwdrivers
- 1 BF 510 pin
- 1 Allen key
- 1 coil template
- 1 drip tip 510/810 adaptor
- 1 Ultem 810 drip tip
- 1 user manual
Specifications
- Length: 3.2 cm
- Diameter : 2.4 cm
- Weight: 40 g
- Capacity: no capacity on a dripper
- 510 screw thread
- 810 drip tip
- Assembly: single or double coil
- Metal bell
- Compatible with coils: rebuildable coil
- Inhalation type: direct
- vapor type: airy
- vapor: warm to hot
- Percentage of VG in liquid for optimum use: ≤ 90% Vegetable Glycerin
- Level: expert
Use
Pull on the atomisation bell to access the base of the plate. Unscrew the plate screws using the screwdriver supplied.
Place your coils on the plate and tighten the screws. Carefully cut a piece of wick about 0.5 cm long, and roll it around to place it in the centre of each coil.
Redirect the wicks to the side of each coil and trim the excess so that the cotton does not protrude from the plate. Cut the coil threads that stick out flush with the mounting studs. Soak your cotton well before closing your clearomizer. Now all you have to do is fill it up and vape!
We advise you to check the ohm resistance of each of your coils with an ohm meter. A too low coil or a short circuit can seriously damage your equipment.
Advice
- We suggest you try several different threads and cottons to find your ideal vape. Bear in mind that the thinner the thread, the higher the resistance and vice versa.
Related products
-
GPC Coils - Fralien coils (2 pack)
 Ni80 - 3 mm11.58 €
 4/5 - 1 reviews
-
GPC Coils - Staggerton coils (2 pack)
 Ni80 or Ni90 - 3 mm13.25 € 4/5 - 1 reviews
-
Wotofo Xfiber Profile cotton
 3.58 € 4/5 - 1 reviews
-
COTN Lump cotton strip
 5.75 €
 -
Wick N Vape Bacon V2 cotton
 3.75 €
 4.8/5 - 4 reviews
-
4-in-1 multifunction tool
 2.92 € 5/5 - 1 reviews
-
Coil cleaner
 3.25 € 4.3/5 - 3 reviews
-
Plato cutting pliers
 4.08 € 5/5 - 5 reviews
-
Ceramic-head pliers
 5.75 € 4.8/5 - 4 reviews